Chinese Soup Dumplings with a time-saving twist!

DSC01357
BOOM! Soup Dumplings!

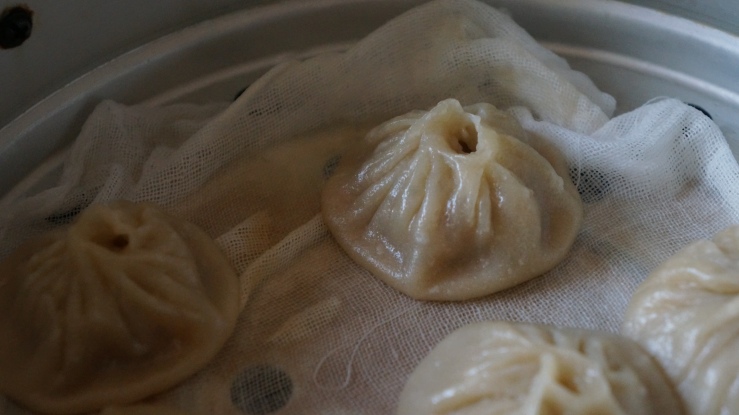
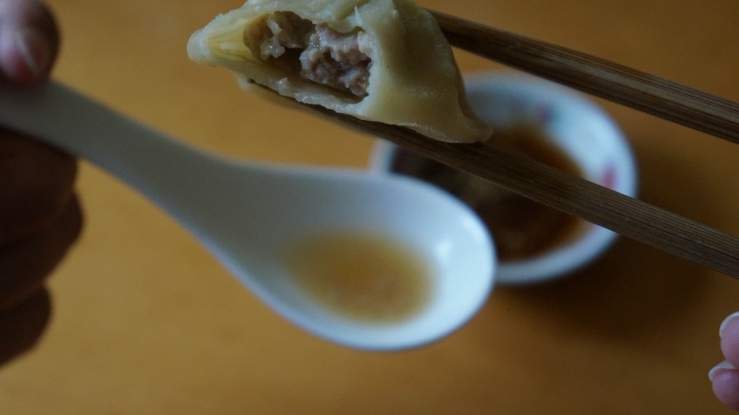
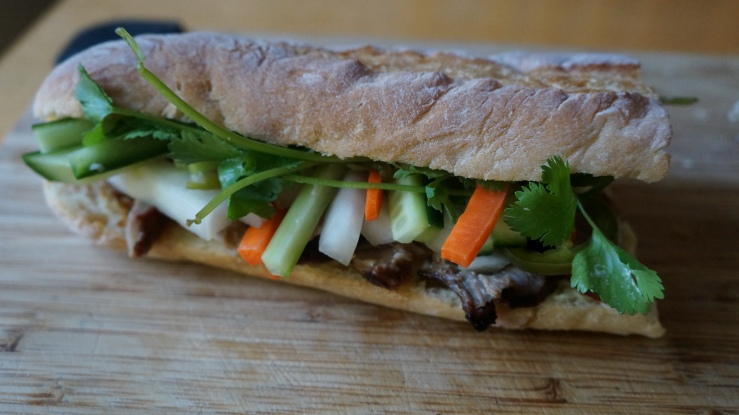
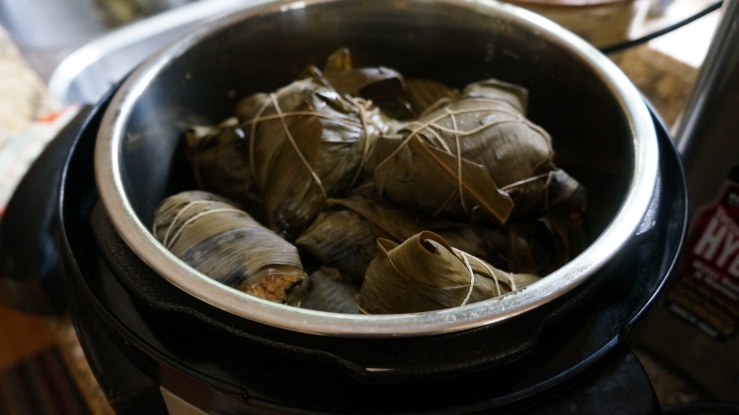
Shanghai soup dumplings, known as xiao long bao in China, are honestly some of my favorite things in the world to eat. A delicate, feather-thin wrapper surrounds a savory pork filling; when you take your first bite, you have to take a second to collect the delicious soup that pours out in a spoon, drink it, and then continue eating the dumpling. As amazing as they are to eat, they are supposed to be time-consuming and difficult to make: traditionally, the soup in each dumpling is put there by first making a pork broth out of connective tissues (usually skin). This broth is both savory and rich in gelatin, and when cooled, solidifies and can be cut into tiny chunks that are mixed up with the pork filling. Upon being steamed, the chunks melt back into soup, and fill the interior of the dumpling. Unfortunately, the broth also takes forever to make. The skins are also difficult to roll thin-enough, and absolutely must be made with a dough that was made with boiling hot water. This process denatures proteins in the dough that would otherwise form gluten complexes, and reduces the springiness of the dough to allow the dumpling skins to keep their shape better and have a denser chew.

DSC01347
The filling, with soup jellies mixed in. 

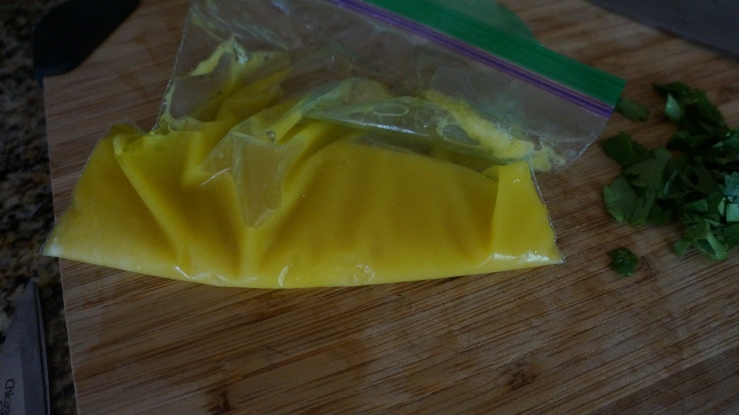
A time-saving tip I first saw on Chefsteps was to use pre-prepared broth and simply add gelatin to make the “soup chunks.” That way, you skip all the time trying to extract and convert the collagen in the pork skin into gelatin. I would suggest that anyone who wants to make these head over to their instructions: normally, I like to work things out for myself, but their recipe is from Andrea Nguyen, who is immensely experienced with Asian cuisine. If I were to make any suggestions, it would be that the ball of dough can be cut into more than the 24 pieces they recommend, and each piece should be rolled out a little thinner than they show.

DSC01348
Dumplings all lined up. Some are prettier than others…

Man, were these good. I’m going to make them again as soon as I can. Next time I’m going to try to score some of the ground pork from Costco, which tends to be really fatty (read: delicious).

DSC01358
Look at all that soup!


Sous Vide Pork Belly

I grew up eating Chinese braised pork belly in two very similar forms: in thick, fatty slices sandwiched with scallions and sauce inside of a steamed bun, or in the form of hong shao rou, consisting of tender chunks of pork belly, cooked twice or even three times, and coated in a thick, dark, glistening sauce. Both classic preparations absolutely require the pork to be deeply flavorful and juicy; as pork belly is a tougher cut and rich in collagen, it requires a longer cook to break the fibers down and turn it into the tender final product. I thought that perhaps sous vide would be a good way to do the initial cook of the pork belly, instead of the traditional techniques of steaming or boiling. Not only would a low and slow sous vide cook help bring the pork belly to that desired tender but not quite falling apart texture, the bag juices combined with the marinade, once reduced, would be just like the traditional savory sauce. For my first big attempt, I thought I would just try to make the first variant and avoid the second and third cooks (usually second in oil, third in braising sauce), but I’m planning to develop a hong shao rou recipe by the end of the summer.

DSC01258.JPG
Pork Belly bagged up and ready to cook

I simply bagged the meat with 4 parts light soy sauce, 2 parts rice wine, 1 part dark soy sauce, and a dash of cinnamon, star anise, and about an inch of ginger. The cook was at 175 for 10 hours; at 175, collagen can begin to break down into gelatin and that hopefully juicy, fall-apart texture is achieved. Compared to a smoker or in a braising environment, the sous vide cook is significantly lower temperature (175 vs somewhere around 230-250) and so it takes significantly longer for that breakdown to happen, thus the longer cook time. When it had cooked for 10 hours, I took it out and reduced the bag liquids into a thick sauce.

DSC01262.JPG
The End Product

The end result was very flavorful and quite tender for pork belly. I do wish that it had cooked for longer; it seems that even a 10 hour cook isn’t quite long enough to deal with a tough cut like pork belly. It was still quite snappy; very good to eat, but not quite the texture I was looking for. When I try to make some hong shao rou, I think I’m going to try a cook around the same temperature for maybe around 24 hours. I’ve heard that modernist cuisine frequently recommends 72 hour cooks!

From-scratch Banh Mi

DSC01338
Hello, beautiful…

In elementary and middle school, I attended Chinese school on Saturdays. Afterwards, I would often be hungry, and if I was lucky, my mom would bring me a Vietnamese sandwich from one of the local stores. Later, when I was older and had sort of forgotten my old post-Chinese school habits, I visited a new sandwich shop in Kirkland (Plume) and was shocked again by how ridiculously good a freshly prepared banh mi could be. I think these sandwiches represent a couple of really important cooking principles: balance of flavor (everything works perfectly together, nothing is overpowering), simplicity (doesn’t require anything particularly fancy or difficult to make/acquire), and quality of ingredients (you can taste every single ingredient distinctly).

After seeing a truck that sold these sandwiches near my internship, I resolved to make my own soon. I scoured the internet for the “classic” ingredients and it came down to the following 7 things:

  • A baguette with a thin crust and light interior (usually hollowed out a little)
  • Grilled meat, or tofu
  • A crunchy vegetable (usually cucumber, for the lightness)
  • Pickles (daikon radish, carrots, jalapeno)
  • Herbs (usually cilantro)
  • Mayonnaise, preferably freshly made
  • An umami-rich sauce, often Maggi, Liquid Aminos, or something like Gravy Master.

I picked a long, freshly baked wild wheat baguette, and also a day old baguette from Jimmy Johns just for kicks.

I picked pork shoulder for the meat; it grills really nicely and has plenty of fat on it. I marinated the pork shoulder in soy sauce, rice wine, a dash of rice vinegar, miso, ginger, lemon zest, garlic, gochujang, and fish sauce. The ginger and lemon zest was in an attempt to mimic the zing of lemongrass. You might notice that my marinade contained multiple fermented/soy products: fish sauce, soy sauce, gochujang (a fermented soy bean paste), and miso (a different type of soy bean paste). All are highly rich in MSG, and were meant to make the meat as savory as possible.

I pickled the traditional daikon, carrot, and jalapenos with Andrea Nguyen’s recipe on VietWorldKitchen. She has great, simple instructions for them. I also used the traditional cucumber, and simply sliced it into matchsticks without pickling.

The mayonnaise I made from scratch, also with Andrea’s expert advice. I replaced some of the canola/grapeseed oil with sesame, to give extra bit of flavor and richness. I also added an extra egg yolk, just to keep it together a little better and to make the eggy flavor stand out a bit more.

Finally, Andrea says that Maggi is necessary for the perfect banh mi, but I couldn’t get any in time. While I can’t be certain (I’ve never tasted Maggi), I’m pretty sure my substitute for the savory sauce worked out better than Maggi would have. I reduced my marinade down, combined it with the meat drippings, and added a couple spoons of Bragg’s liquid aminos. I then strained the whole things, and reduced it further, until it turned into a thick, dark, glossy sauce.

DSC01334
All the components of a good banh mi, laid out (sauce absent).

To assemble: Slice the bread open, lengthwise. Hollow out just enough to be able to fit all your fillings comfortably. Spread mayonnaise liberally over both faces of the open bread, then put a couple drops of the savory sauce. Stack meat, pickles, cucumbers, and herbs within and serve.

I enjoyed the whole process a lot, and the end result was excellent. I think the mayonnaise and sauce are key to the whole sandwich, they help bring the whole sandwich together. My one issue was probably that the bread had a little too much chew. Next time, I’d like to pick up a baguette from Le Panier in Pike Place, which prepares them really classically (light crust, extremely feathery light interior).

Sous Vide and Carbonara: A Perfect Match

One of my favorite pasta dishes is Spaghetti Carbonara. It can be made with just a handful of ingredients, but at the same time is incredibly rich, flavorful, and delicious. In particular, because it is so simple, it showcases the flavors of the individual ingredients particularly well; thus, using high-quality ingredients pays dividends.

DSC01325.JPG
Spaghetti Carbonara, with bacon and garnished with parsley.

The basics of Carbonara:

  • A salted, cured, pork product is diced and fried in a pan.
  • Al dente spaghetti is strained and added to the pan with a little bit of pasta water and tossed.
  • Eggs (whole or yolks, depending on preference) are whisked with grated pecorino-romano (more traditional), parmigiano-reggiano (less traditional) or a mix of both cheeses.
  • The egg/cheese mixture is then added to the still-warm pasta, and the residual heat from the pasta melts the mix into a rich, creamy sauce.

Then, the problem: Adding the egg mixture too early, while the pasta is still steaming hot, results in plain pasta with scrambled eggs instead of carbonara. Adding the eggs a minute too late, on the other hand, results in a thin, not very appetizing sauce. Just like in making poached eggs, there’s a certain point where the yolk is thick enough to clearly not be raw, but at the same time, has not started becoming solid quite yet: that’s texture is the key to carbonara.

Here’s where sous vide comes in. Instead of letting the pasta cook the eggs, the pasta can be cooled to serving temperature. The egg yolks are instead heated to the perfect texture in a sous vide bath, and used immediately when done to make the sauce. When I was dreaming up this recipe, I saw that many people had suggested doing this already; however, everywhere I looked suggested simply topping an unfinished carbonara with the cooked yolk. I thought that cooking the whole sauce (just eggs and cheese) together, with the yolks already broken, might make for a simpler and more delicious service, allowing the had cheese and yolks to melt together in the heat. No one online seemed to have tried it before, so I resolved to do it.

The end result? Absolutely delicious. The sauce was rich and creamy, coated the pasta extremely well, and when I took the bag out of the water bath, it was completely uniform in texture. I’ll definitely be trying this again, and I suggest you do the same.

DSC01304.JPG
The sauce, cooked sous vide for an hour at 145F.

Spaghetti Carbonara:

  • 300g Spaghetti
  • 3oz grated hard cheese (pecorino or parmesan)
  • 4 egg yolks
  • salt and pepper to taste
  • olive oil
  • 8oz guanicale, pancetta, or bacon

Heat the sous vide bath to 145F. Place the egg yolks into a bag with the cheese, break the yolks, and shake vigorously. Allow the mixture to cook in the sous vide bath for at least an hour. Cook the pasta to al dente. Cut the cured meat into small pieces, around the size of a penny. When the pasta is about half done, begin frying the cured meat. The fat should be mostly rendered and the meat nicely crisped, but still with a tiny bit of chew. If the meat reaches this point before the pasta is done, remove from heat. When pasta is done, discard most of the water, leaving about 1/4 cup. Pour pasta into meat pan and toss gently, then place in a mixing bowl and wait until it’s cool enough to eat comfortably. Add the egg mixture, toss to combine, and season to taste. Enjoy!


Using Pectinase for Enzymatic Peeling!

This picture might just look like peeled Grapefruit. And it is! But it’s also a whole lot more exciting than that.

DSC01232.JPG
Just peeled grapefruit?

The difference was that this grapefruit wasn’t peeled by my hands, or my moms’ hands, or even my dads’ hands. It was peeled by millions (billions?) of molecular machines that I commissioned (ordered from Amazon) for this purpose.

Enzymes are proteins made by living organisms that catalyze (essentially speed up) reactions. What this means in essence is that they are specialized machines that either break things apart or put things together. Pectinases are a class of enzymes that break down pectins, an exceedingly common carbohydrate that is similar to cellulose and similarly is considered dietary fiber. In many fruits, pectin is a significant structural component of the fruit, especially in the white part of citrus peels, known as the pith.

I simply ordered some brewing pectinase from Amazon. If you are planning to order from Modernist Pantry soon, I would suggest picking up some Pectinex Ultra (a mix of various pectinases that is reportedly significantly more effective). I added grapefruit pieces to water, added a few drops of pectinase, and let it sit. Within an hour, you could see the peel beginning to slough off the fruit. After another hour, I rinsed in cold water thoroughly, and had an impeccably peeled grapefruit. Other than it just being cool, there might not seem to be a significant advantage to using pectinase. But consider: it’s hard for a human to peel a citrus fruit that well, and enzymatically-peeled fruit is always turns out impeccably. And also: a human could peel a grapefruit in 15 minutes, while pectinases might take an hour or two. But while a human might take 10 hours to peel 30 grapefruits, pectinases could peel the same amount in an hour or two still, and you wouldn’t have to pay someone to do it or listen to their protests against peeling 30 grapefruits 🙂


Learning from Chef Max Petty of Eden Hill

This past Saturday, I had the opportunity to learn from Chef Maximillian Petty at the Atrium Kitchen in Pike Place Market. It was a super cool experience, and I got to reflect on my own cooking, get inspired about things I might want to cook in the future, and  also feast on delicious food.

Unfortunately, I only got cellphone pictures, so you’ll have imagine everything looking a little more lively and colorful like I saw it.

20160709_162303.jpg
Cauliflower Chilaquiles

The first course: cauliflower chilaquiles with manchego creme fraiche and red curtido. This was absolutely amazing: I would eat this every day if I could. A whipping siphon was used for the creme fraiche, but personally, I didn’t think it made too much of a difference. In aprticular, Ienjoyed the color of the dish, and the balance of flavors with the cauliflower: spicy, salty, sweet, sour, floral, meaty, etc. When I first heard the dish, I thought it was a little out there, but it absolutely, absolutely works.

20160709_173904.jpg
Dessert

My other favorite was the dessert: A roasted half-peach, with ginger bubbles and roasted white chocolate bark. The ginger bubbles were made by whipping ginger beer with soy lecithin (lecithin has a polar end and non-polar end, so it forms bubbles like soap). The white chocolate bark was absolutely divine, made with crushed burnt white chocolate blended with un-roasted white chocolate. It had a mysterious, coffee-like, spicy, quality that I couldn’t resist.

In sum, white chocolate bark is delicious (I want to make roasted white chocolate ice cream sometime), cooking with accomplished chefs is inspiring and a great learning experience, and you should make it down to Chef Petty’s Eden Hill sometime (and so should I)!

20160709_160841
The man himself.

Love and Spinalis Dorsi: A Kitchen Tragedy

For months now, I’ve been enjoying the benefits of the Costco meat aisle. Prime cuts (aka top 2-3% of U.S. Beef) of meat, with astonishing marbling, for prices cheaper than choice steaks at my local Trader Joe’s or Safeway? Amazing.

DSC01284
My beautiful Ribeye-Cap Reconstituted Steaks, after Activa RM dusting.

Despite my appreciation for the beautiful NY Strips or prime tri-tips that Costco puts out, there has been one cut that I’ve just been  drooling over: the ribeye-cap, also known as the spinalis dorsi. At Costco, they take some prime ribeyes, cut off the cap, and sell the eye of ribeye and the cap separately, with the long, flap-like cap bound into steaks with butcher’s twine.

ribeye cap
The ribeye-cap highlighted on a normal ribeye (please excuse my MS paint skills). Compare the marbling on the ribeye-cap to the rest of the ribeye.

Seeing it for the first time at Costco was love at first sight. It was on a level entirely apart from any other piece of meat I had ever witnessed. Even my mom (who barely eats beef) noticed that it was looking especially good. Upon returning home and doing some research, it was confirmed that what I had sighted was indeed, the cream of the crop, la creme de la creme.  Various sources on the internet, from cooking forums to reddit to SeriousEats made remarks such as “best meal I’ve ever eaten” to “the secret best part of a cow” to “as tender as tenderloin, and as flavorful as flank.”

The only negative was that I realized the beautiful circular steaks I saw at Costco were actually a long strip wrapped around itself, and thus would not hold up well in sous-vide and the sear afterwards. The solution? Trans-glutiminase, also known as Activa (or meat glue, eurgh), an enzyme that binds animal proteins together to reconstruct meats. Activa RM would let me bind the ribeye cap into one whole, continuous steak, like a ribeye on steroids.

And so I resolved to someday feast on ribeye-cap. And finally, it happened.

I wont make you scroll through all the photos, but here is a slideshow to show the entire process.

This slideshow requires JavaScript.

After opening the package, I cut apart the ribeye caps and reformed them with Activa RM (just a light dusting on the connecting surfaces). I cooked them Sous Vide at 134F to appease the tastes of my very traditional parents, and then finished with a sear and basting with butter, garlic, and thyme.

At the butter basting step, I was salivating. But when I sliced the steak open, I was a little disappointed. First of all, the steak was surprisingly thermally conductive. In a NY Strip of the same size, I could sear for the same length with very little change in internal temperature. But somehow, due to the fiber structure or perhaps the increase in fat, my sous vide cook was pretty much undone by the sear (you can see in the final picture the intense temperature gradient). Another disappointment was the texture: it was amazingly tender, but not in the same way as a tenderloin. The fibers of the meat were loose and separated easily, in a way that was not quite as pleasing as the dense mouth-feel of a ribeye. In addition, the places where the two pieces of meat joined together had an interesting texture; I hadn’t expected each steak to be two pieces, and by aligning them imperfectly, the fibers crossing made it a little tougher to chew than the surrounding parts. In addition, while the steaks were undone, there were connective tissues (re: tough) that I could and should have removed, but didn’t.

In conclusion, the spinalis dorsi is undoubtedly a prize cut of meat, but didn’t quite meet my lofty expectations and was likely not the right cut for the applications I was trying to shoehorn it into. Or, equally likely, I merely need to try again with the lessons I learned this time. And finally, Activa RM is amazing (it worked with no drawbacks).

A Sneak Peek: Zong Zi

One of my projects over the summer is to figure out a recipe that turns out excellent zong zi every time. For those who have never had a zong zi, they’re a triangle of sticky rice and marinated meat that’s cooked in bamboo leaves. Despite being extremely simple, they’re the food I look forward to most when I go back to China.

DSC01187.JPG
Zong Zi in the pressure cooker…

Anyway, stay tuned! Delicious Zong Zi coming soon!

NO2, N2, and N2O: A Whipping Siphon Clarification

I’ve noticed a lot of people using incorrect terminology to address the whipping siphon chargers and their uses, and I’d like to clear it up a little.

Many people call the gas used in the chargers “NO2.” I’ve definitely made this mistake a couple times myself, and it just seems to roll off the tongue in a way that is conducive to making this mistake repeatedly. At the same time, NO2 is very toxic due to its free radical properties, and is a significant component of smog and acid rain (NO2 is a gas you might hear referred to as a NOx gas). Besides, it has a not-so-beautiful brown color, as you can see below.

nitrogen dioxide
Mmmm…brown whipped cream. Picture from Wikipedia

At the same time, many others refer to the chargers as “nitrogen.” I’m not quite sure if this is just a quick convenience or they believe they are actually charging with nitrogen (N2) gas. This use of the term nitrogen has perpetuated the idea that whipping siphons can be used to make “nitro brew,” a coffee drink that actually does use nitrogen gas in it.

In reality, whipping siphon chargers use N2O, also commonly known as laughing gas. Why doesn’t it cause us to have the same reaction as in the dentists office? I haven’t really been able to find an answer, but my guess is that there isn’t enough of it dissolved in the whipped cream to cause a noticeable reaction, and the gas released by the siphon quickly diffuses throughout the room to unnoticeable quantities.

A cool thing I noticed…

Whenever I look at a sous vide machine through a camera, it always looks like this:

It looks like the display is broken, but in reality, both are functioning normally. When looked at through non-robotic eyes, the LEDs shine un-waveringly. I realized that the LED display is constantly updating itself, and doing it so quickly that we don’t see any change at all. On my sous vide machine, it does it from left to right; on the sansaire, its from top to bottom. At the same time, the camera sensor (disclaimer: I know little about camera optics) is recording so fast that it catches (seemingly) every updating frame in the display. I’m not sure if I should be in awe of the camera, or the display of the sous vide machine, or just disappointed in my eyes.